
Cloudflare Setup
The following screenshots illustrate how to configure Cloudflare to deliver content. Essential settings are marked with a red circle.
This setup can be completely done in the browser by using the Cloudflare Dashboard only. If you are already familiar with Cloudflare Workers, Wrangler & GitHub and not afraid of entering commands in a terminal window you might want to follow the instructions here instead.
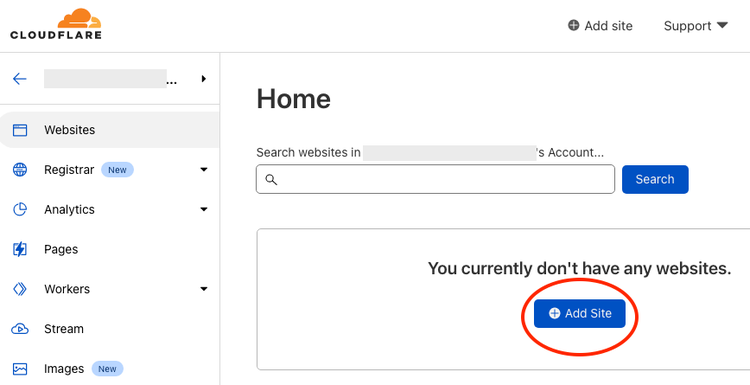
Create a Cloudflare site
If you already have a cloudflare site and DNS setup you can skip forward to the Setup push invalidation section.
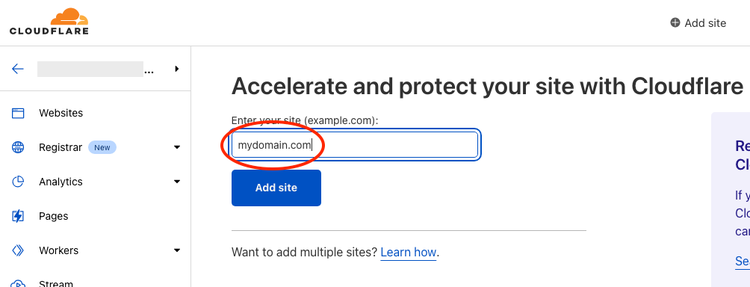
Enter the domain:
Select a plan:

Note that surgical push invalidations are only supported on the Enterprise plan. On all other plans the entire cache of the site will be purged every time an author publishes a content change.
For this walk-through we’ll use the Free plan.
DNS Setup
For a new site, we’ll start with a simple DNS setup.
- Create a new
CNAMErecord. If your zone isexample.comand you want to serve traffic onwww.example.com, then the name should bewww - If you want to serve traffic on example.com (without a www) then the name should be
@ - And if you want to serve traffic on all subdomains, then the name should be
*as in the screenshot below - As we are using workers to serve the content, the value of the Content field does not matter. It’s easiest to use your
ref--repo--owner.hlx.livehost name here. This is a hostname, not a URL, so leave out the leadinghttps://
Make sure the CNAME record is Proxied:

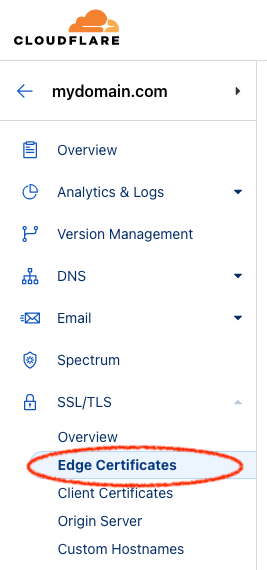
SSL/TLS Setup
Select SSL/TLS from the left pane and Edge Certificates in the dropdown list:
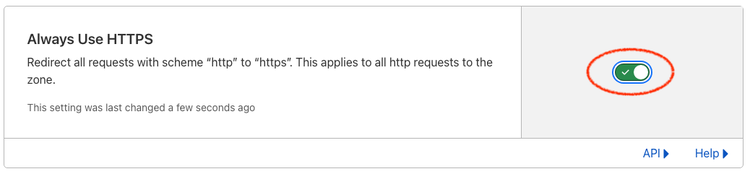
On the right side, scroll down to Always Use HTTPS and enable it:
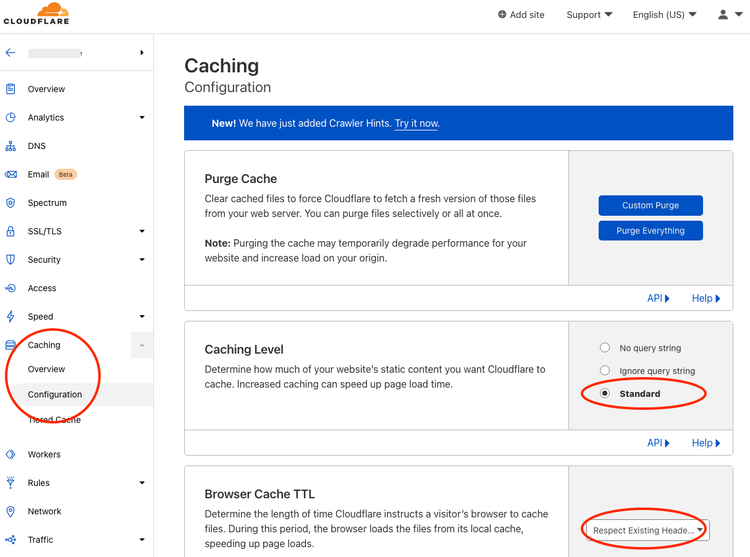
Configure Caching
Create Page Rule


Create Worker
Choose Workers in the left pane and click on “Manage Workers”:

Click on “Create a Service”:

Enter a name for the worker (e.g. “helix-worker”) and click on “Create Service”:

Click on “Quick edit”:

Edit worker code
- If you have successfully configured push invalidation copy the content of this file, otherwise copy the content of this file.
- In the left pane, replace the existing content with the copied content.
- Click on “Save and Deploy”:

Click on Settings and “Add variable”:


Add a variable ORIGIN_HOSTNAME and set the value to the hostname of your origin (e.g. main--mysite--hlxsites.hlx.live):

Click on Triggers an select “Add route”:

Enter your domain route (e.g. www.mydomain.com/*), select your zone and click on “Add route”:

Depending on the setup chosen in DNS Setup, you would select routes www.mydomain.com/*, mydomain.com/*, or *.mydomain.com/*
After completing all steps you should be all set.
Expanding the AEM footprint on your website
In case you start with having only a portion of the website being routed to your .live origin and have routed a specific folder (eg. /blog/*) you can subsequently add more routes whenever you are ready to expose new sections of the site by simply adding more routes and repeat the last “add route” steps as needed, without changing your worker configuration.
Watch out for duplicate content
Search engines often penalize sites for duplicate content, so it's important to make sure your content is not available on the web elsewhere. Cloudflare, unfortunately, has a default setting that will expose your site on additional network ports. In paid Cloudflare plans you can block traffic on these additional ports. This is a recommended setting for production sites.
Previous