
Cloudflare Setup
This document illustrates how to configure Cloudflare to deliver AEM content. Essential settings are marked with a red circle.
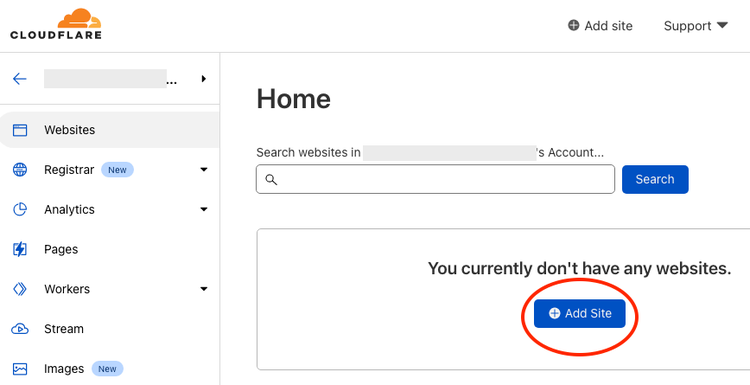
Create a Cloudflare Site
Log into your Cloudflare account. And under Websites, create a new site by clicking Add Site.
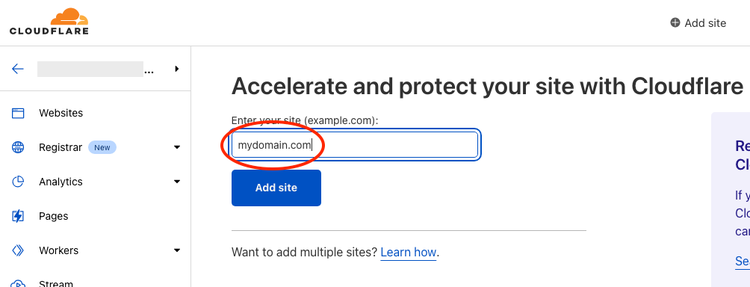
Enter the domain and click Add site.
Select a plan for your new site such as Pro, Business, or Enterprise.
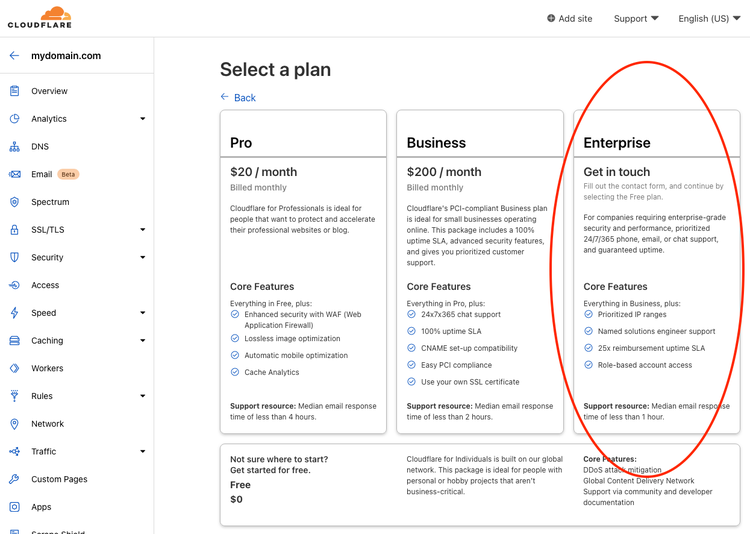
The setup described in this walk-through requires the Enterprise plan. If you want to use another plan (incl. Free plan), please follow the instructions here.
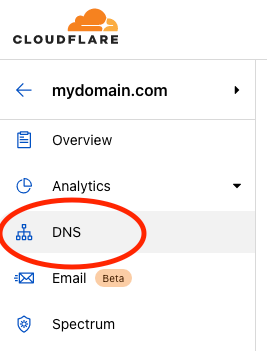
DNS Setup
Select DNS in the left pane:
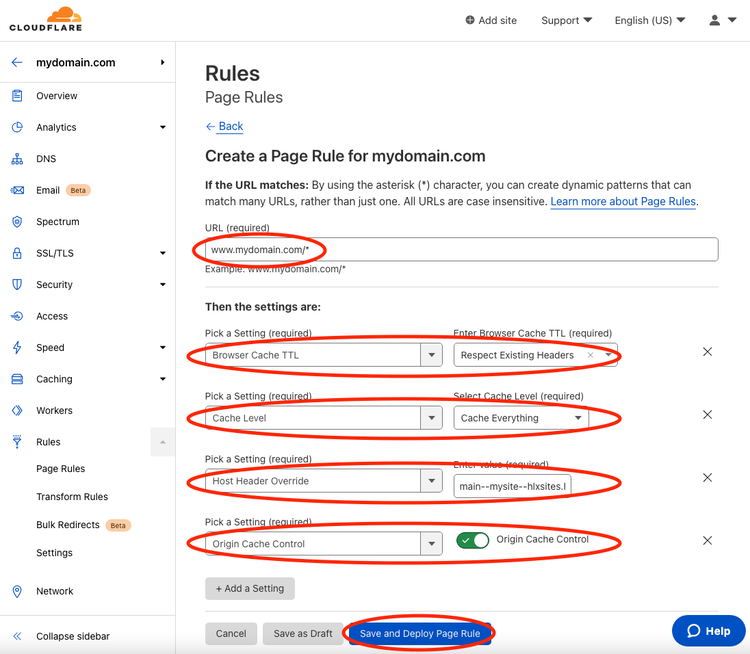
Click on Add record to add a CNAME record. Enter the value to the hostname of your AEM Live origin (e.g. main--mysite--hlxsites.hlx.live) in the Target field.
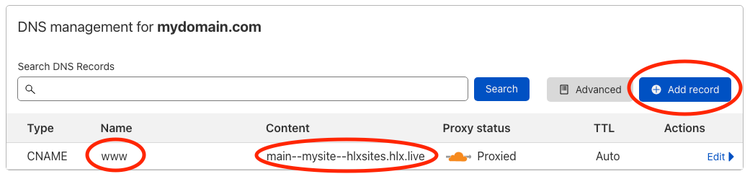
Make sure the CNAME record is Proxied.
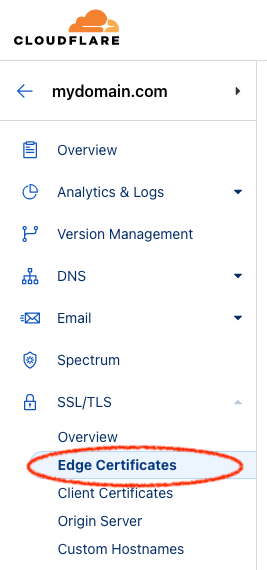
SSL/TLS Setup
Select SSL/TLS from the left pane and Edge Certificates in the dropdown list:
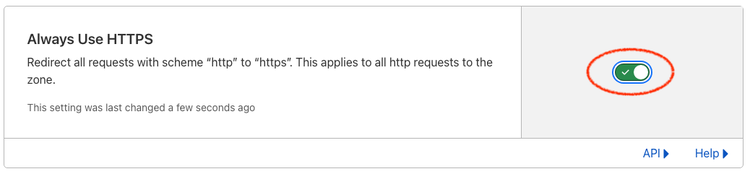
On the right side, scroll down to Always Use HTTPS and enable it:
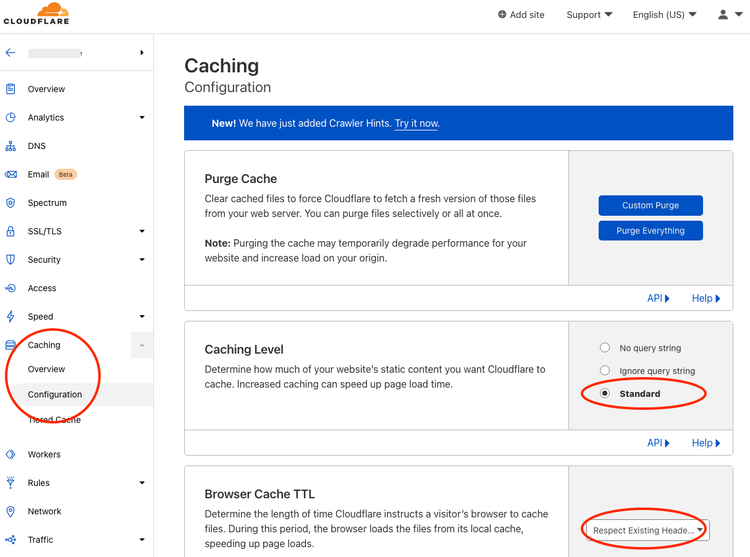
Configure Caching
Create Page Rule

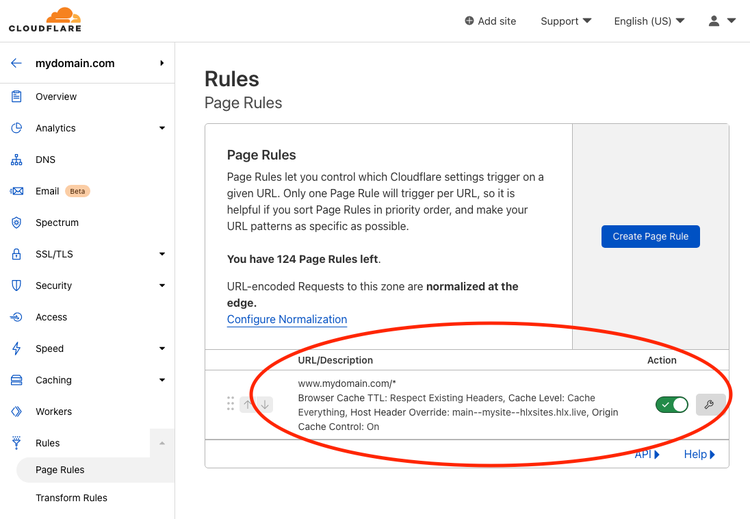
The result should look like this:
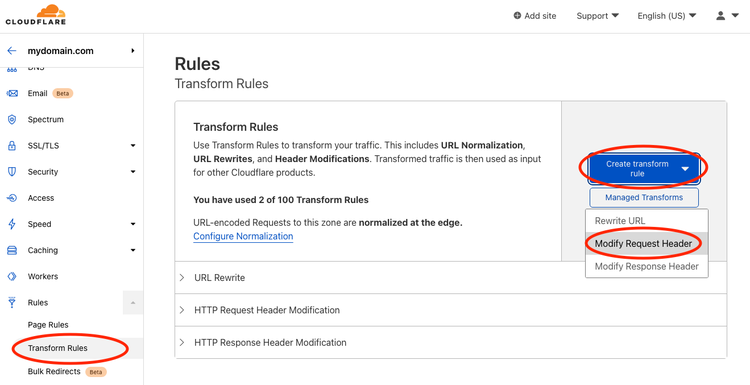
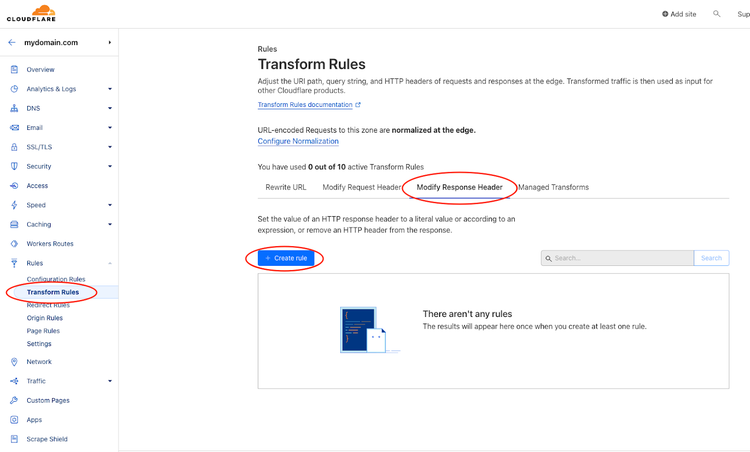
Create Transform Rules
Choose Transform Rules in the left pane, click on Create transform rule and select Modify Request Header:
Enter a name (e.g. Required AEM headers) and complete the form as follows (replace www.mydomain.com with your domain):
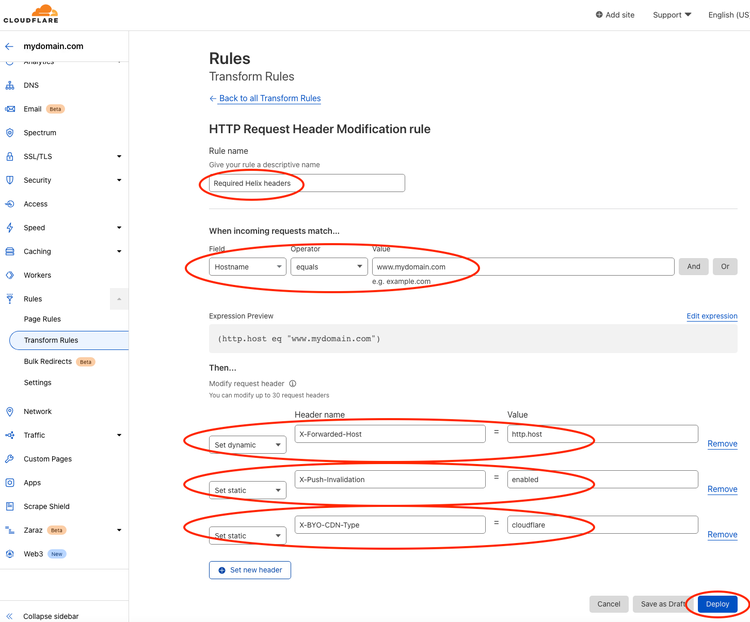
NB: The X-Push-Invalidation: enabled request header enables the AEM push invalidation including long cache TTLs. Make sure you have successfully configured push invalidation for your project.
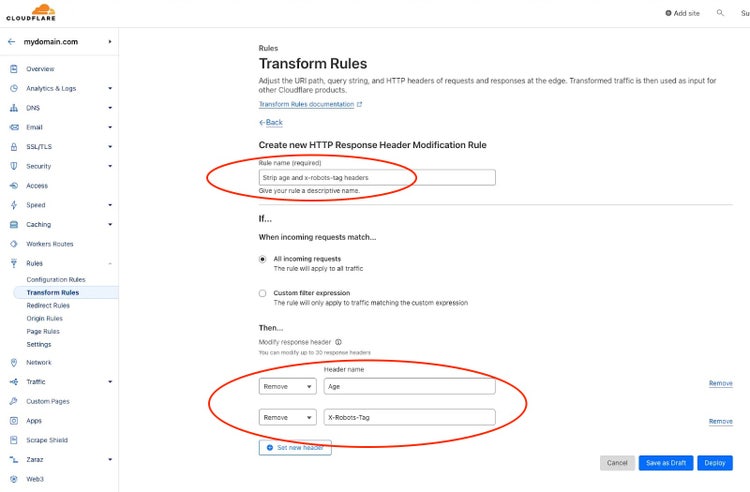
Now, similarly, add a Modify Response Header rule:
After completing all steps you should be all set.